
Showing posts with label Vintage Style. Show all posts
Showing posts with label Vintage Style. Show all posts
Monday, 12 September 2016
Back Stitch
The second most important hand stitches, second to the running stitch. It leaves you with a solid line of stitching which I think is more aesthetically pleasing than a running stitch. I recently used back stitch to make a Fedora.
 Sew a single straight stitch. Push your needle up a space ahead, then bring your needle through the same hole as the previous stitch. Continue the process, leaving with an unbroken line of stitching.

Handmade Retro Style Collars
Detached Collars with ribbon for an Adjustable size. Now available @ HandmadebyIsobelle on Etsy.


Wire Stitch
Wire stitch is a stitch often used in millinery. I recently used the stitch to attach wire around the rim of the wool fedora.
 Wire stitch is simply a blanket stitch used to attach a piece of wire to fabric. You will need to hold your wire in position on the end of your fabric. The next step is to push the needle through the fabric from back to front. Do the same stitch again, through the same place and going from back to front. One you pull the needle through this will leave you with a loop going over the wire and holding it in place. Push your needle through the loop you have just made. Move a short distance along and repeat the process.

Tilly and the Buttons Arielle Skirt
I've been looking for the perfect button front a-line mini skirt in shops but I just couldn't find it. I have now given up and decided to make my own. Tilly and the Buttons have a great pattern called the Arielle skirt, which interestingly buttons asymmetrical.
Fabric-I made my skirt out of blue corduroy I had lying around the house.
What Else will you need- To make the skirt you'll need interfacing for the facings and between 6-8 buttons.
Pattern- I bought the paper pattern from Tilly and the Buttons website

Difficulty- This was a very simple make with easily understandable instructions.
Shape and Fit- The skirt is a very flattering shape.
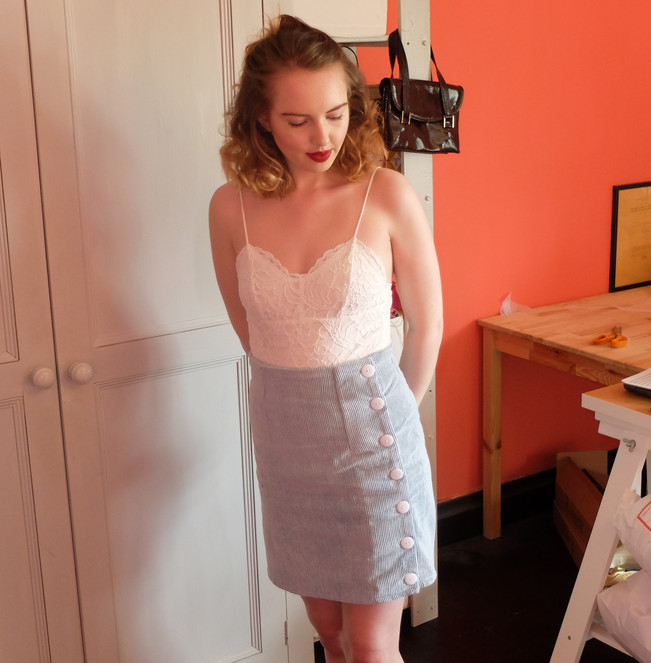
Overall, I think this is a great pattern and I've finally got a a-line skirt to add to my wardrobe. I paired it with the Lace Scallop Body from Topshop.
Sunday, 11 September 2016
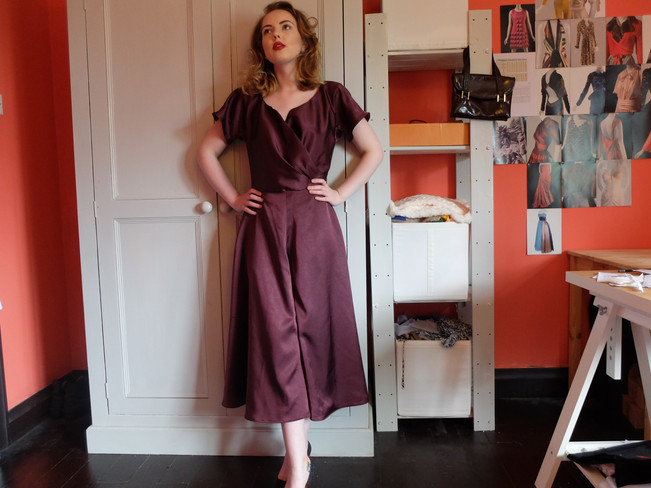
Sew Vintage Magazine's 1950's Dress

Fabric- I decided to make my version with a crinkle satin polyester in a burgundy colour. Incredibly slippy but a very pretty colour.
What else will you need- The dress needs a invisible zip and a little bit on interfacing for the facings.
A Little Tip- If you need step by step instructions on how to insert underarm reinforcement squares, I found a useful tutorial on Handmade Jane's Blog. This post explain the processes a lot better than the pattern, with lots of useful pictures.
Shape and fit- There quite a lot of fabric in the bodice and I would probably take it in a little bit more if I was to make the dress again.
Overall, I'm pretty happy with the dress. It has a lovely drape to it and a great new addition to my wardrobe.

The Secret World of Millinery: How to make a Fedora
The word Fedora comes from a play "Fedora" by Victorien Sardou . In 1882, the actress Sarah Bernhardt played the role Princess Fedora Romanoff and wore a centre creased soft brim hat. The hat also became popular choice for women's rights activist's. It wasn't until the 1920's, that men began wearing fedoras (popularised by Prince Edward).
Now I've decided to make my own. Using a Stetson crown block and wide circular brim block. I used two bottle green wool felt capeline which I steamed and stretched over the two blocks.


Traditionally a milner would sew the entire hat by hand so that's what I did too. Putting the hat together requires three different hand stitches; wire stitch, back stitch and stab stitch.
Wire Stitch
Wire stitch is the stitch I used to sew the wire round the brim.

Back Stitch
Back stitch is one of the essential hand stitches. I used it to attach the crown and brim.

Stab Stitch
Stab stitch is the stitch I used to sew petersham around the edge of the brim and sew in the hat band.

After hours and hours of hand sewing, all that's left to do is add a hat band. Then it will be ready to wear.

Subscribe to:
Posts (Atom)